
Keeping a pull-up bar from spinning can be difficult if you don’t know the right methods to stop it.
A spinning pull-up bar can put a tone of pressure on your wrists, which may end up in possible injury or pain.
Fortunately, I’ve got the solution you need…
If you read this article till the end, you are going to learn what are the “top 5 best fast and easy ways to stop your pull-up bar from spinning“.
If you want to take your pull-up bar workouts on the next level I highly recommend you to take 3 seconds, enter your email below and download our huge free guide Pull Up Bar Training 101: Everything You Need To Know.
It’s packed with applicable advice and can really help you better and faster results based on science. And it’s 100% Free!
[thrive_leads id=’15601′]
Here’s exactly what you’ll learn next:
Hi there, my name is Bozhidar, and luckily for you, I grabbed from experience some wise moves to keep a pull-up bar from spinning.
They’re easy are so easy to do…
With the help of practical knowledge, logic, and science, I will completely stop your pull-up bar for spinning no matter if it’s a DIY one or a factory made.
So read the whole thing to secure the best and safest pull-up experience.
To keep a pull-up bar from spinning, you’ll have to do the following methods:
When should I stop the pull-up bar from spinning?
You should stop the bar from spinning when you don’t know the right gripping techniques for handling a spinning bar.
If you can’t stop the bar from spinning, you can either install and use another bar, or you can simply wear gears on your hands to support your grip.
If you prefer to buy a pull-up bar that doesn’t spin, instead of building your own, you can check my highly recommended product here.<<
This is the best commercial static pull-up bar I’ve ever used!
FYI: There actually exists a spinning pull-up bar, opposite the static one [1]. And yes, you guessed it right. The spinning pull-up bar spins for a reason.
However, if that reason doesn’t support your desired training result, or if it doesn’t match your training level, then it isn’t for you.
I will further explain the difference between the 2 later in this article.
This time, continue scrolling down to learn how to do the 5 ways…
Nailing the pull-up bar to a wood is a practical solution. It’s also cheap, especially when you’re rooting for a DIY outdoor pull-up bar.
When nailed, the bar won’t find any chance to spin.
Here are some items you will need…
The steps are as follow:
What is the best material for my pull-up bar?
The best material for your pull-up bar is a metal pipe or any metal variant like galvanized iron and stainless steel.
This method will surely keep your pull-up bar firm. But, it might not work sometimes. So, it’s better to have another option.
Read on to learn the second one…
Welding the bar to any strong metal frame fixes its spinning permanently. So if you’re planning to do this method, you’ll have to mind a fixed, permanent pull-up bar location.

The types of DIY pull-up bar that benefit from welding include:
CAUTION:
1. Welding is a powerful process of joining metals together by melting them using electrically-charged superheat spewed by a welding device [2].
This makes welding an extremely critical option.
According to this study [3], welding without the safety gears can expose you to health hazards:
Safety is therefore a priority during welding. For that, I will include safety measures alongside the tips below…
2. If you’re doing it for the first time, I would recommend that you let an expert do it instead. Only consider welding when there aren’t any options available.
What are the safety measures for welding?: The safety measures include:
And, that’s about it.
Now, it’s time to learn how to weld the bar….
Here are some items you will need…
Do you prefer to weld a factory-made pull-up bar? I recommend that you buy the best one to avoid possible problems.
Click this link here to check my top pull-up bar. I really like this pull-up bar because it is made from strong material.
It’s really perfect for welding and customizing.
The steps are as follow:
Alternative: Welding the DIY ceiling, wall-mounted pull-up bar, and outdoor pull-up bars might take different processes accordingly (depending on their setups).
So check out the tutorials to properly set each one up.
Tutorial: Click this link to learn how to do it.
Tutorial: Click this link to learn how to do it.
Tutorial 1: Click this link to learn how to do it.
Quick Note: Welding takes a bunch of considerations before being done. If you don’t have enough materials and equipment for doing it, I recommend skipping that option off.
If you don’t wanna go through the trouble of manually welding a pull-bar to an anchor, I suggest you skip that method.
You can instead buy this top pull-bar product that’s already welded and attached to a wall/ceiling at a reasonable price.
All you have to do is to mount it!
It’s durable, and it’ll surely save you time and money…
So check out another easy method below…
This method also works as a practical solution against a spinning pull-up bar. On top of that, buying gymnastics rings does not cost as much as a well made pull-up bar.

According to this study [5], gymnastics rings are more effective for pull-ups than an actual pull-up bar because of the following 4 reasons:
Here are some items you will need…
The steps are as follow:
Alternative/s: If you are training at home the gymnastics rings are best attached/hang to a wall/ceiling-mounted pull-up bar, and outdoor pull-up bars.
Despite some people saying [6] that they can be attached to a doorway/frame pull-up bar, I don’t recommend it.
That is because both pull-up bar types have smaller weight limits and are not usually not very stable. If you insist on using such, you won’t be able to move that freely or do explosive training on the bar.
Using gymnastics rings is a great alternative for building muscles.
If you still haven’t done so I highly recommend you to click this link to check my top wooden gymnastics rings.<<
I’ve been using these rings for years, and they never failed me since.
Attaching the gymnastics rings take specific methods to do per pull-up bar. So, it’s important that you learn the different setups below:
Recommended Ceiling Pull-Up Bar: (click here for more information)
Tutorial 1: Click this link to learn how to do it.
Recommended Wall-Mounted Pull-Up Bar: (click here for more information)
Tutorial 2: Click this link to learn how to do it.
Recommended Outdoor Pull-Up Bar: (click here for more information)
Tutorial 3: Click this link to learn how to do it.
Recommended Power/Squat Rack: (click here for more information)
Tutorial 4: Click this link to learn how to do it.
But I don’t want to spend time and money on buying gymnastics rings.
I’d like to instantly stop the pull-up bar from spinning so that I can do the exercises right now. What can I do?
A practical and instant solution, besides gymnastics rings, to stopping the pull-up bar from spinning is the 4th method below. Here’s how to do it…
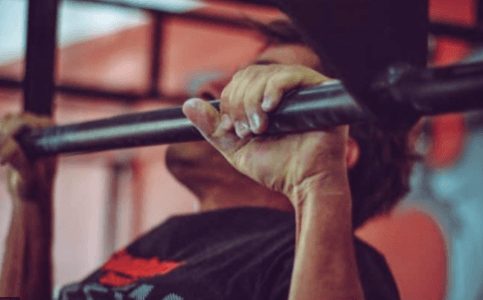
Using a towel or any piece of cloth on a spinning pull-up bar works every time as a practical and instant solution.
Here are some items you will need…
The steps are as follow…
Why a simple towel can keep any pull-up bar from spinning?
According to this study [7], the towel can effectively keep the pull-up bar from spinning because it focuses weight on a specific area in the bar, unlike when you grip it with your hands.
When you grip a spinning bar with your hands, the force of the weight becomes unequal (as felt in the torque in your wrists).
By all means, your palms are expected to face upwards due to the torque of your wrists, pulling the bar down to a spin.
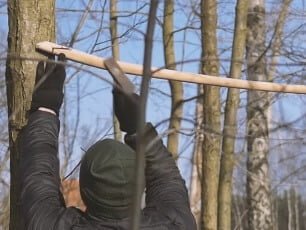
Alternative: You can use the towel or any piece of cloth on any pull-up bar. In fact, you can even use it on any strong tree branch and instantly do outdoor pull-ups.
Tutorial: Click this link to learn how to do it.
This method is one effective move. But, what if you’d like to focus on training your grip with a spinning bar? Now, that’s where the straps get in…
Get lucky and learn how to do it…
If you’re looking to build muscle mass with your grips supported, and still stop your pull up bar from spinning then straps are the perfect solution for you.

Because of simple physics they easily keep the pull-up bar from spinning by preventing the wrists from dragging the bar downwards.
Here are some items you will need…
The steps are as follow…
Alternative/s: The regular straps do not really work to train your grip. They only exist to assist your grip and keep the bar from spinning.
Now, if you’re thinking of (at least) training your grip a bit while keeping the spinning out, I recommend that you use the Versa Grips
Click this link to get a view of my highly recommended Versa Grips.
Tutorial: Click the link to learn how to do it.
Can I use ab straps instead of regular straps to keep the pull-up bar from spinning?
Yes. You can absolutely use ab straps to keep the pull-up bar from spinning.
But, take note that as its name suggests, it concentrates on training your abdominal and hip muscles (done through elevated crunches and sit-ups) more than the upper body muscle groups.
Using ab straps is an awesome way to build up abdominal muscles on a pull-up bar. I recommend you to click this link here to check what are my favorite ab straps<<.
They are stable and they support a lot of weight.
And that’s it!
You’ve got all 5 easy ways to keep a pull-up bar from spinning. Now, you surely won’t run out of options.
But wait…
There are still important things to clarify before you close this page!
The better option for a complete beginner is a static pull-up bar [8]. But, that doesn’t mean that the spinning pull-up bar isn’t useful at all. If you are an advanced athlete who wants to build strong grip strength then you may want to include a spinning pull-up bar exercises in your training.
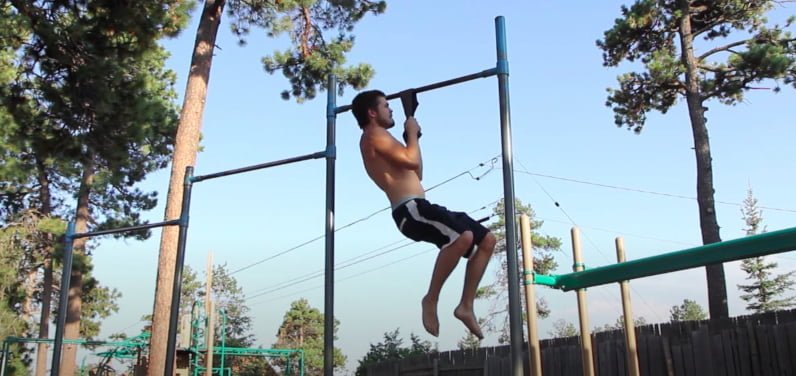
What’s the main difference between a static pull-up bar from a spinning one?
The main difference between a static pull-up bar and a spinning pull-up bar lies with the level of difficulty.
You’ll find it difficult to grip a spinning bar. Due to friction and the torque exerted by your wrists (through body weight), the spinning pull-up bar rotates more intensely, making every exercise a lot more difficult.
To make-up, your hands will have to exert more effort to maintain a better grip. Thus, you’ll have to be at an advanced training level to play out with such a level of difficulty.
A static pull-up bar, on the other hand, requires less grip control and balance, making it easier for gripping. It securely stays in place, allowing you to move freely and do fuller reps.
I am a complete beginner. What can I do to work out on a spinning bar?
If you are a complete beginner but had to work out on a spinning bar, here are easy and effective ways to do it:
Does a spinning pull-up bar build better and stronger grip strength?
Yes, a spinning pull-up bar builds better and stronger grip strength by conditioning the hands and wrists to exert more effort in gripping the bar [9].
A big hand to you, mate… You’ve reached this far!
I know it’s a lot but let’s move on for some quick overview….
If you are an advanced athlete who’s looking for the best way to train your grip strength, then the spinning pull-up bar is perfect for you!
However, if you are a complete beginner, it is essential that you build a DIY static pull-up bar first or simply learn how to stop your current one from spinning follow one of the in-depth tutorials I’ve explained earlier.
Otherwise, it would be difficult for you to begin working out.
Here’s a recap of the 5 best ways to keep a pull-up bar from spinning:
But that just scratches the surface of pull-up bars and what you can achieve with their support. If you want to get even better simply follow these 2 easy steps:
Step 1:
If you already haven’t, enter your email and download our completely free massive guide teaching you everything about you need to know about pull-up bars (it’s really awesome and it will help you a lot)
[thrive_leads id=’15601′]
Step 2:
Read even more awesome articles about pull-up bars that will help you get bigger, stronger, and leaner. Here are a couple of great reads you are going to love:
See you again,
– Bozhidar